Five Grain Bread: Mellow Bakers: "Five Grain Bread is one of the breads we're making in the Mellow Bakers' group this month. I really like multigrain breads so I was looking forward to making this one.
This is a hearty grain bread, high in fiber, and great in taste. The grains contribute to the nutrition, but they also hold a lot of moisture, which helps to extend the fresh life of the bread. That's a good thing because the flavor of this bread improves with age.
I had fun with this bread. I got to try out some of my new bread-baking tools and my new bread bags.
Here is the Five-Grain Bread peeking out of a Bamboo Turtle Bread Bag.
The neat thing about these Bamboo Bags is that they keep your bread fresh and help the environment at the same time. Click here for more info on these nifty bread bags.
Five Grain Bread
The formula for this bread can be found on page 238 of Bread: A Baker’s Book of Techniques and Recipes by Jeffrey Hamelman.
If you do not have a copy of the book, you can find a version here, however, I would urge you to get the book to view all the extra tips and helpful hints.
To make this bread:
You begin by adding rolled oats, flaxseeds, wheat bran, and cornmeal in the cold soaker water. I didn't have flax seeds so I used flaxseed meal. I had frozen some wheat bran that I sifted from whole wheat flour to make clear flour (during the BBA Challenge) so this was a good way to use it up.
Next, you mix all of the ingredients until the gluten network has been fairly well developed.
Then, you let the dough ferment for 2 hours or retard in the refrigerator overnight. I opted to retard it in the refrigerator overnight. The next day when I removed the dough from the refrigerator, I let it warm up on the counter for several hours.
After the first hour, I degassed it by folding the dough.
Then I placed the dough back in the bowl to ferment for another hour or so and performed the fold again. I probably shouldn't have folded it again because I think I degassed it too much.
After the dough had rested for about 30 more minutes, I removed it from the bowl onto a counter sprinkled with flour.
Then, I divided the dough into three pieces - about 1.5 pounds each. I had a little extra dough so one piece was bigger. I made the batard with this piece.
Then I shaped each piece loosely into a round ball and placed the balls seam side up on the counter to rest until they had relaxed enough to continue shaping (about 20 minutes).
Once the dough had relaxed sufficiently, I continued shaping the balls into the shapes I wanted.
I shaped the first one into a tight round ball (boule) and placed it seam-side up in my new banneton basket. I've been holding off getting a banneton, but it makes the bread so pretty, I finally caved in and got a couple.
I shaped the next ball into an oval shape and placed it seam-side up in my oval banneton. This photo is rather fuzzy. It's a little bit tricky trying to shape the dough and take photos at the same time.
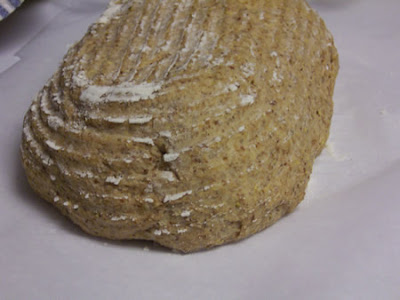
I shaped the third piece of dough into a batard. It is one of my favorite shapes. Since I only have two bannetons, I placed the batard seam-side up on parchment paper.
I covered the loaves with plastic and a linen cloth for the final fermentation.
The dough fermented for about an hour or so.
Then I scored the first loaf and placed it in the oven to bake on the preheated baking stone with a steam pan underneath.
I started baking the loaf at 450 degrees, then reduced it to 425 because my oven gets really hot and I don't particularly like crispy (burnt) bread. To get the steam effect, I used a steam pan filled with a cup of hot water underneath the baking stone. I also spritzed the walls of the oven three times in 30-second intervals with a water spray bottle during the first 15 minutes of baking.
I removed the first loaf, then baked the other two loaves using the same process. The oblong loaf came out of the banneton very smoothly, but the round loaf stuck to the banneton so I had to redo it.
Here's a picture of the oval loaf cooling on the wire rack.
The oval loaf was my favorite.
We sliced it and have been enjoying it for the past few days. I actually took this photo a couple of days after I sliced it because I had forgotten to get a crumb shot. Although the crumb is not open and airy, I really like this bread and it tastes good even after several days. It makes great cheese toast and it's great warm with butter.
I gave the round loaf to my boyfriend because he really likes this bread and froze the batard loaf. We'll see how well it freezes.
I also sent this bread to be YeastSpotted. Please visit Wild Yeast to view all of the lovely breads in the roundup.
Thanks for joining me in the Bread Experience bread-baking blog. I hope you’ll join me again soon.
Be sure to check out what all the other bakers have been up to in the Mellow Bakers group.
Happy Baking!
Cathy
 The Mellow Bakers group was started by Paul at Yumarama. We’re baking breads from Bread: A Baker’s Book of Techniques and Recipes by Jeffrey Hamelman.
You might enjoy some of the other breads that we've featured in the Bread Baking Blog.


No comments:
Post a Comment